Introduction
Doors are an essential part of any home, providing privacy, security, and style. However, over time, interior doors can become worn, outdated, or simply no longer fit the overall aesthetic of a space. Instead of replacing these doors, a cost-effective and creative solution is to refinish and repurpose them. DIY door projects allow homeowners to add a unique touch to their homes while saving money. In this article, we will explore various techniques and ideas for refinishing and repurposing old interior doors.
Refinishing Old Interior Doors

Refinishing old interior doors can breathe new life into a space, restoring their beauty and enhancing the overall appeal of a room. Here are some steps to follow when refinishing an old interior door:
Gather the Necessary Tools and Materials
Before starting the refinishing process, it is essential to gather the necessary tools and materials. These may include:
- Sandpaper of varying grits
- Paint stripper or varnish remover
- Paintbrushes or foam brushes
- Wood stain or paint
- Sealer or varnish
- Drop cloths or plastic sheets
- Protective gear such as gloves and goggles
Remove the Door from Its Hinges
To make the refinishing process easier, it is advisable to remove the door from its hinges. Lay it horizontally on a stable surface, such as a workbench or sawhorses, to ensure easy access to all sides.
Strip the Old Finish
Using a paint stripper or varnish remover, carefully strip off the old finish from the door. Follow the instructions provided by the manufacturer and ensure proper ventilation in the workspace. Apply the stripper evenly with a paintbrush or foam brush and allow it to sit for the recommended time before scraping off the old finish with a putty knife. Repeat this process until all the old finish is removed.
Sand the Door
After stripping off the old finish, sand the entire surface of the door using sandpaper of varying grits. Start with a coarse grit to remove any remaining finish or imperfections and gradually move to finer grits for a smooth finish. Sand in the direction of the wood grain to avoid creating scratches or uneven surfaces.
Apply Stain or Paint
Once the door is sanded and smooth, it is time to apply a new finish. Choose between staining the wood to enhance its natural beauty or painting it to match the desired color scheme. Use a paintbrush or foam brush to apply the stain or paint evenly, following the manufacturer's instructions. Apply multiple coats if necessary, allowing each coat to dry completely before adding the next.
Seal the Door
To protect the newly finished door and ensure its longevity, it is crucial to seal it with a clear sealer or varnish. Apply the sealer according to the manufacturer's instructions, using a brush or roller. This step adds a protective layer and enhances the overall appearance of the door.
Reinstall the Door
After the finish has dried completely, it is time to reinstall the door back onto its hinges. Ensure that the door is properly aligned and functions smoothly. Enjoy the refreshed look of the refinished interior door!
Repurposing Old Interior Doors

Another creative way to transform old interior doors is by repurposing them into new functional or decorative pieces. Repurposing allows homeowners to give old doors a new purpose while adding a unique element to their living spaces. Here are some repurposing ideas to consider:
Headboards
Transform an old interior door into a stunning headboard for your bed. Sand and refinish the door to match your bedroom decor, then attach it securely to the wall behind your bed. The door's size and architectural details can create a focal point in the room and add a touch of vintage charm.
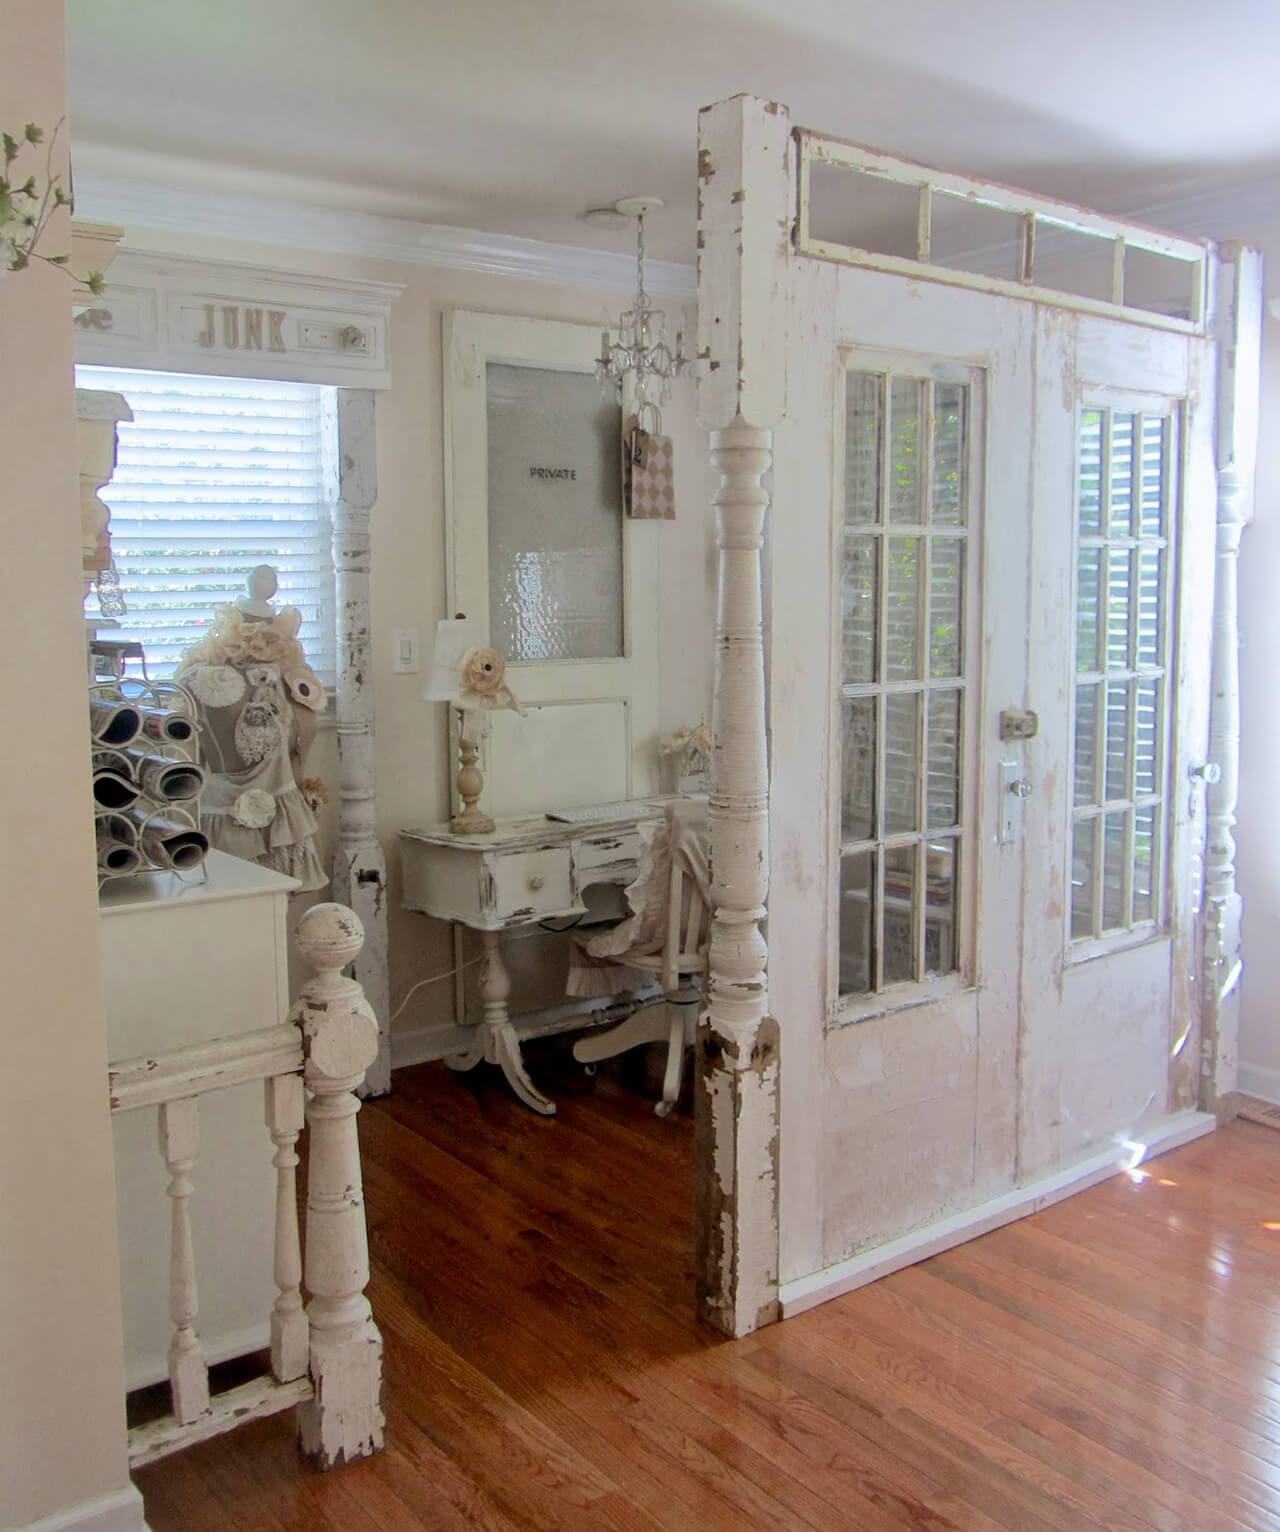
Room Dividers
Use old interior doors to create room dividers, providing privacy and defining separate areas within a room. Attach multiple doors together using hinges or install them on a sliding track system for added functionality. Paint or stain the doors to complement the overall decor and style of the space.
Shelving Units
Transform an old door into a unique shelving unit by attaching shelves to the door's horizontal panels. Sand and paint the door, then install brackets or supports to hold the shelves securely. This repurposed door can serve as a stylish storage solution for books, decorative items, or plants.
Picture Frames
Cut an old interior door into smaller sections and repurpose them as picture frames. Sand and paint the sections to match the desired aesthetic, then attach photos or artwork to create a personalized gallery wall. The different panel designs of the door can add visual interest and dimension to the displayed images.
Outdoor Furniture
Repurpose old interior doors into outdoor furniture pieces such as benches or tables. Cut the door to the desired size and shape, then sand and paint it with outdoor-grade paint or stain. Add legs or supports to create a sturdy and functional piece of furniture for your outdoor living space.
Conclusion
Refinishing and repurposing old interior doors provide homeowners with endless creative possibilities. Whether you choose to restore the doors' original beauty or give them a new purpose, these DIY projects allow you to save money, add unique touches to your home, and contribute to sustainable living by repurposing instead of discarding. With the right tools, materials, and techniques, old interior doors can become stunning focal points, functional pieces, or works of art that enhance the overall aesthetic of your living spaces.